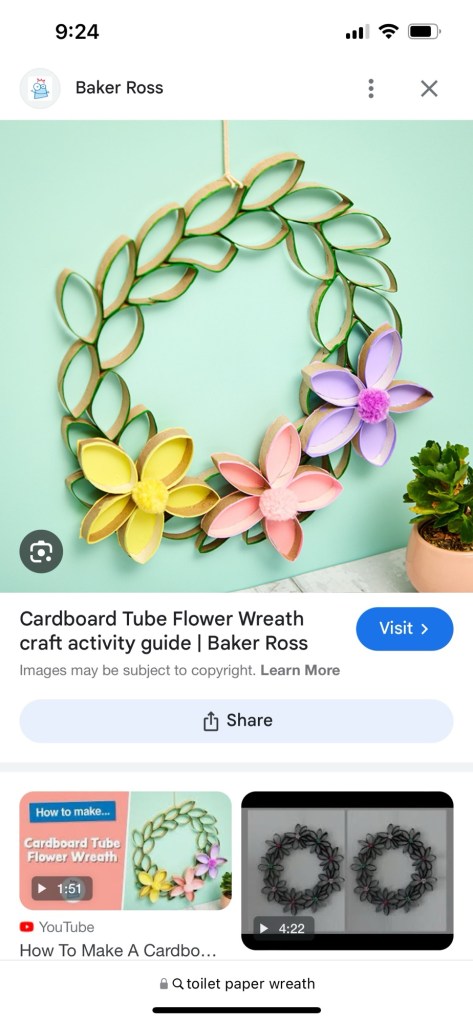
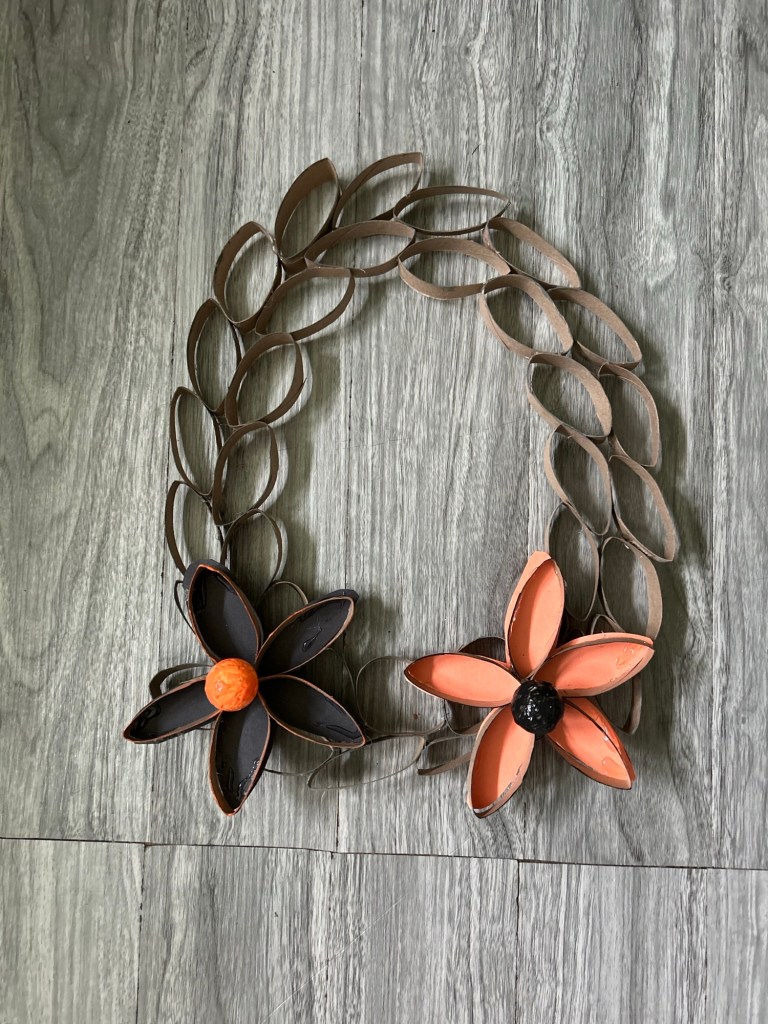
This is the second idea for the class I’ve been asked to teach. Class length: 45 minutes. Class size: currently unknown. Complete project as pictured can’t be completed in 45 minutes. In the picture above, the leaves have been traced with paint. I ran out of time. 😢
The aspect I really like about this project is that you can do it for any season. Our conference is in the fall. Participants can make a fall, Halloween, Christmas, or a more spring theme if they choose.
Things I don’t like about this project: hot glue guns. Don’t get me wrong, I think hot glue is the ticket. But each person is going to need a glue gun to use. We might run into the power issue that developed from my class last year. I tried regular glue; it didn’t dry fast enough. Also tried a mini stapler, it was too cumbersome. Materials: this project requires a lot of stuff.
Materials list: 8 inch plate, glue gun and extra sticks, tissue roll (toilet paper), construction paper, scissors, rulers, markers, pompoms or foam craft balls, paint, paint brushes.
Instructions: plug up your glue gun so it can be getting hot. Each wreath needs approximately 10 tissue rolls. Using a ruler mark 1/2 inch sections down the roll. Use scissors to cut the tissue roll across but at an up angle. Lay plate on flat surface (face down) place two rolls of petals (cut tissue rolls) around the plate. When you are happy with how they look, start glueing at the end of the petals. As you work your way around, it’s okay to glue the petals together toward their centers. In the end, it will make your wreath stronger. As you glue, you may discover you need more petals. I did. No problem. I had several left over. The test wreath only got two flowers. I used 5 petals, in a star pattern to make each flower. When you are happy with how they look, glue them together where the petals meet. Pick out which season you want your wreath to represent, choose 2 sheet of construction paper for that season. I chose Halloween and used black and orange. Lay the flower on the construction paper, trace. This doesn’t have to be perfect. You need a little overhang to glue your flower too. Once you cut out your flowers, glue your star pattern to the paper. Then glue to wreath. Make sure you have them where you think they look best before you glue. Once flowers are on, glue pompom to the center. I didn’t have black or orange pompoms so I had to paint them.
If you have time, paint rim of flowers. You can match the paper if you would like. I chose to paint mine the opposite color.
Use twine for a hanger at the top.
All done.
This project (so far) is the winner.
